Pin It
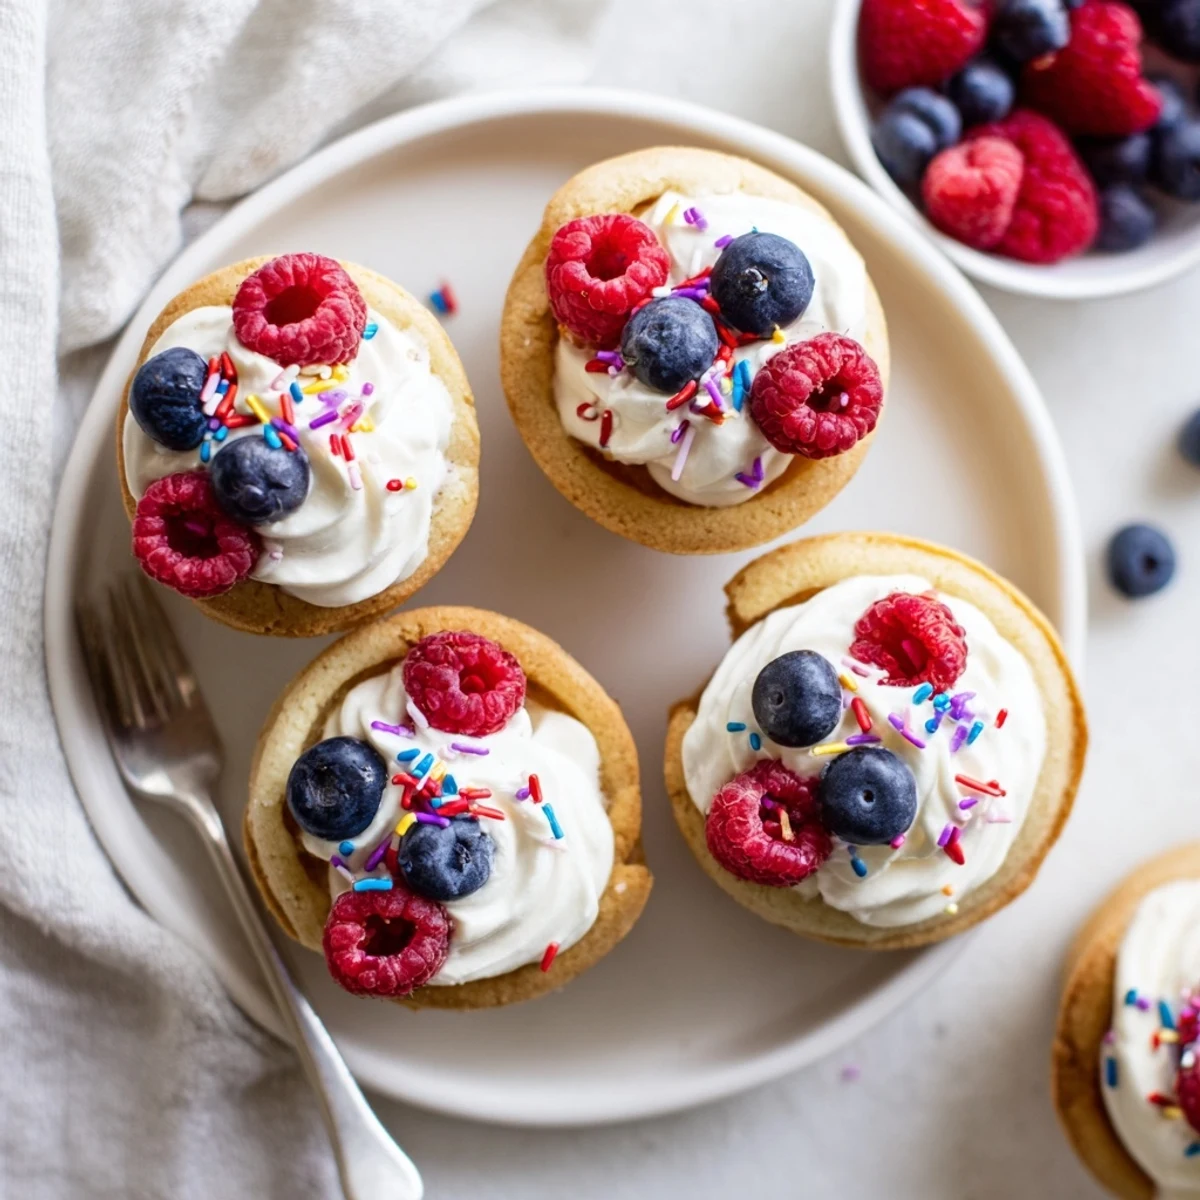
 These delightful sugar cookie cups combine the classic taste of homemade sugar cookies with a fun, bite-sized presentation perfect for any celebration. The cookies are baked in mini muffin tins, creating a natural cup shape that holds your choice of fillings—from fluffy whipped cream to chocolate ganache or fresh fruit preserves.
The process is straightforward: prepare a standard sugar cookie dough, press into greased muffin cups, and bake until golden edges form. While warm, gently press the centers to deepen the cup shape, then cool completely before filling with your desired toppings.
Customization options are endless—try lemon curd for a tangy twist, chocolate ganache for rich indulgence, or keep it simple with vanilla whipped cream and fresh berries. These handheld treats store well and can be made ahead, making them ideal for busy hosts.
The first time I made sugar cookie cups was actually by accident—I'd run out of proper tart shells but had a house full of people expecting dessert. These tiny, edible cups ended up stealing the entire show.
Last summer, my niece helped me make a batch for her birthday. We set up a topping bar with bowls of sprinkles, berries, and crushed cookies, letting kids build their own creations. The kitchen looked like a confetti explosion, but seeing their faces light up was worth every speck of glitter on the floor.
Ingredients
- 2 1/4 cups all-purpose flour: The foundation that holds everything together—spoon and level it to avoid packing too much in
- 1/2 tsp baking soda: Gives these just enough lift to form perfect cup shapes without spreading too thin
- 1/2 tsp salt: Balances the sweetness and enhances all the vanilla notes
- 3/4 cup unsalted butter, softened: Let it sit at room temperature for about 45 minutes—it makes or breaks the texture
- 1 cup granulated sugar: Creates that classic sugar cookie sweetness and crisp edges we all love
- 1 large egg: Room temperature eggs incorporate better into the dough for uniform baking
- 2 tsp pure vanilla extract: Don't skimp here—this is what makes them taste like home
- 1 cup heavy cream, chilled: The magic filling that transforms these into something extraordinary
- 2 tbsp powdered sugar: Just enough sweetness to balance the whipped cream without overpowering
- 1/2 tsp vanilla extract: Infuses the cream with that classic flavor everyone recognizes instantly
Instructions
- Get your oven ready:
- Preheat to 350°F and generously grease your mini muffin tin—every nook and cranny needs attention
- Whisk the dry team:
- Combine flour, baking soda, and salt in a medium bowl, making sure everything's evenly distributed
- Cream the butter and sugar:
- Beat them together for a full 2 minutes until they're pale and fluffy—this step is worth the extra time
- Add the egg and vanilla:
- Mix until everything's incorporated, scraping down the sides of the bowl to catch any hiding flour
- Bring it all together:
- Gradually add the dry ingredients, mixing just until you no longer see white streaks—overmixing makes tough cookies
- Shape your cups:
- Scoop about 1 tablespoon of dough into each muffin cup, then press gently up the sides to form that cup shape
- Bake to golden perfection:
- 10 to 12 minutes until the edges are lightly golden and the centers are set
- Deepen the wells while warm:
- Use the back of a spoon to gently press the center of each cookie while they're still warm, then let them cool for 10 minutes in the tin
- Whip up the filling:
- In a chilled bowl, whip the heavy cream with powdered sugar and vanilla until stiff peaks form—it should hold its shape when you lift the whisk
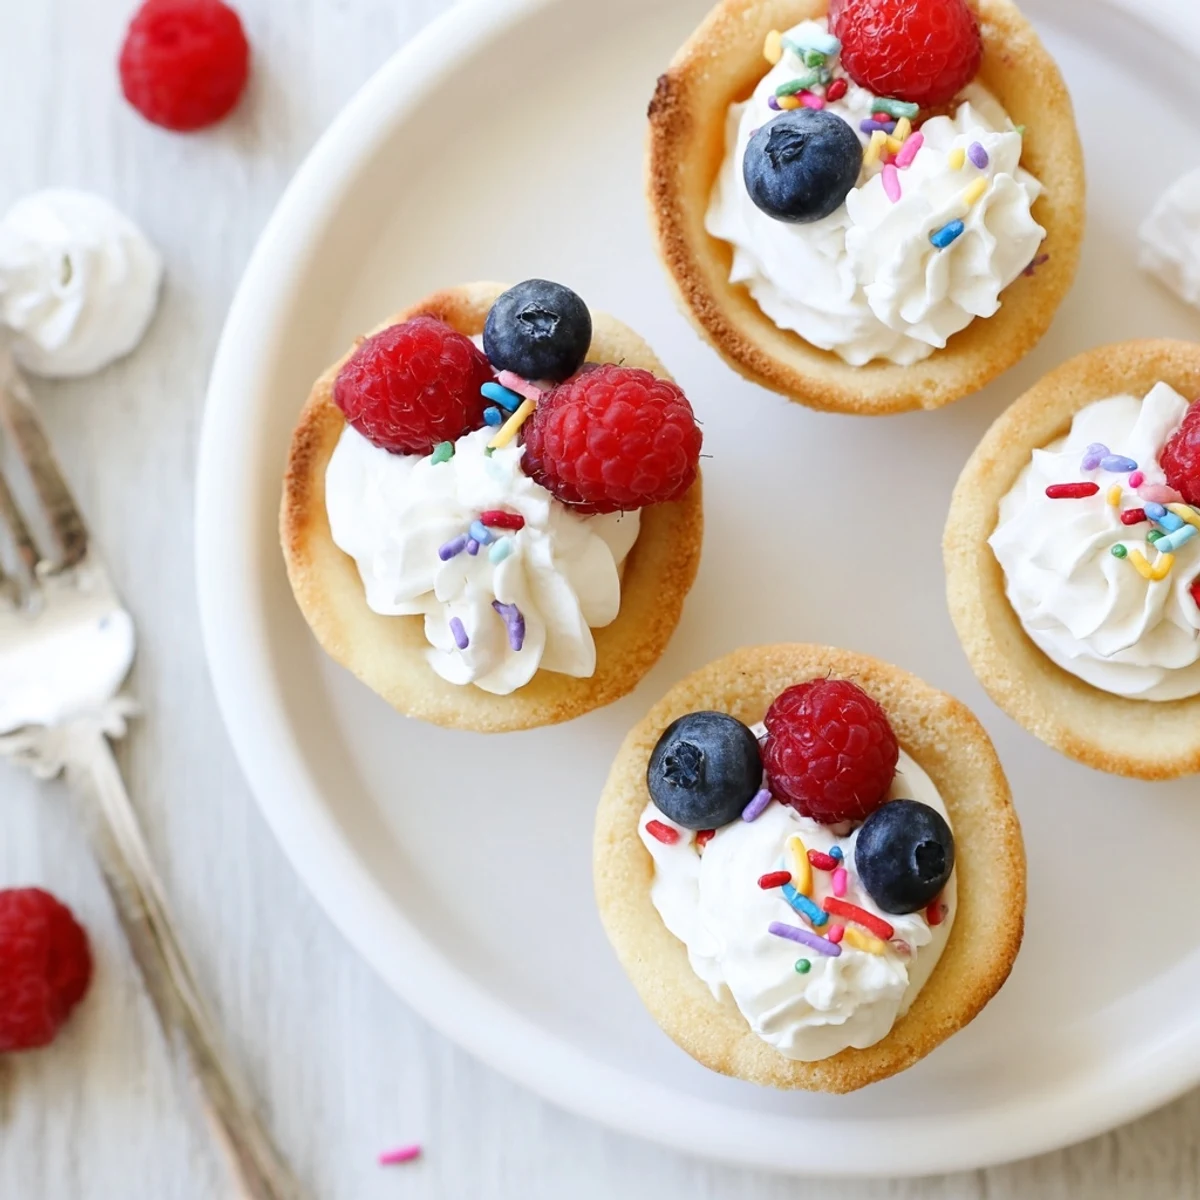
- Fill and decorate:
- Pipe or spoon the whipped cream into each cooled cookie cup and top with whatever makes you happy
 Pin It
 These became my go-to contribution for every gathering after my book club requested them by name. There's something about handheld portions that makes people try flavors they'd normally skip—I've watched confirmed chocolate-only people surprise themselves with lemon curd versions.
Filling Ideas Beyond Cream
Lemon curd creates this incredible bright contrast against the sweet cookie shell, while chocolate ganache turns them into something indulgent and rich. I've even used them as tiny vessels for ice cream at summer barbecues.
Making Them Ahead
The cookie shells keep beautifully in an airtight container for up to three days. Just don't fill them until the last minute—nobody wants a soggy cookie cup situation.
Getting Creative With Colors
Holiday-themed batches are where these really shine. Pastel dough for Easter, red and green swirls for Christmas, or match them to birthday party colors. The possibilities are endless.
- Add food coloring to the dough before shaping for colorful cups
- Mix sprinkles directly into the dough for confetti cookies
- Brush the baked cups with egg white and dip in colored sugar for extra sparkle
 Pin It
 Watch these disappear faster than any full-sized cookie at your next gathering. They're tiny, adorable, and somehow taste even better than regular sugar cookies.
Recipe Q&A
- → How far ahead can I make the cookie cups?
-
The unfilled cookie cups can be stored in an airtight container for up to 3 days at room temperature. Fill them just before serving to maintain the best texture and prevent sogginess.
- → Can I freeze the baked cookie cups?
-
Yes, baked and cooled cookie cups freeze well for up to 2 months. Place them in a freezer-safe container with parchment paper between layers. Thaw at room temperature before filling and serving.
- → What other fillings work well besides whipped cream?
-
Try lemon curd for a bright citrus flavor, chocolate ganache for richness, cream cheese frosting for tanginess, or fruit preserves like strawberry or raspberry. Nutella, peanut butter, or even ice cream just before serving also work wonderfully.
- → Do I need a mini muffin tin?
-
A 24-cup mini muffin tin works best for achieving the proper cup shape. If you only have a standard muffin tin, you can use it but the cups will be larger—you may need to adjust baking time to 12-15 minutes and press deeper to form the center well.
- → Why do I press the center while warm?
-
Gently pressing the warm cookie centers creates a deeper well for filling. The cookie is pliable when warm but firms as it cools. If you wait until completely cooled, the cookie may crack or resist shaping.
- → Can I add food coloring to the dough?
-
Absolutely! Add gel or liquid food coloring to the dough along with the wet ingredients. This works especially well for themed events—pastels for spring, bright colors for birthdays, or red and green for winter holidays.