 Pin It
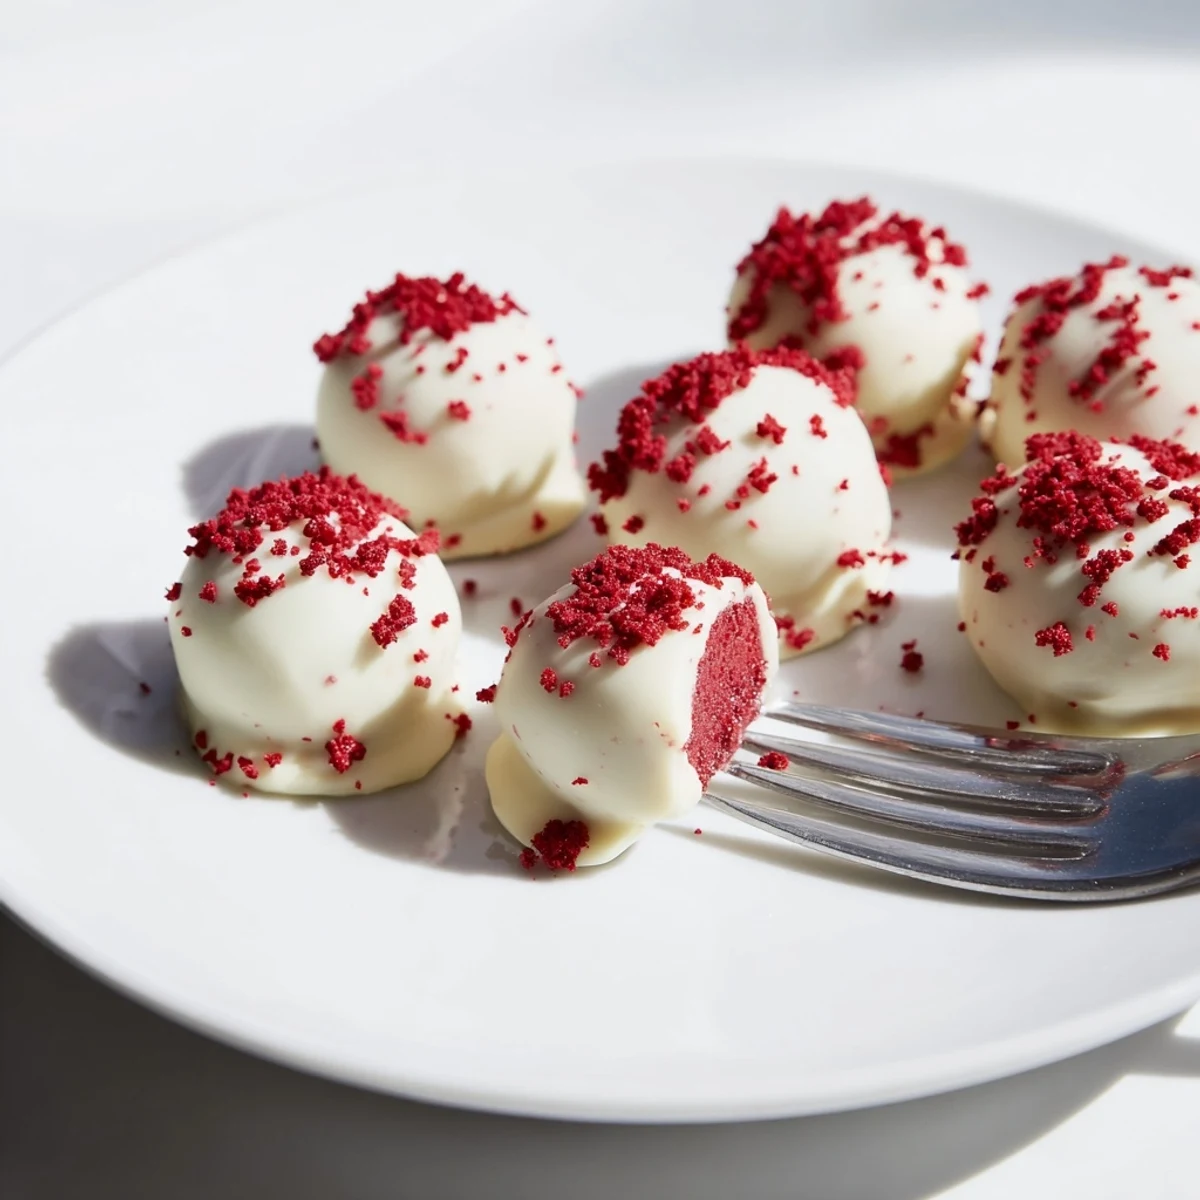
 These luscious red velvet truffles combine moist cake crumbs with smooth cream cheese to create a rich, soft center. Once chilled and shaped into bite-sized spheres, they are dipped in melted white chocolate and decorated with cake crumbs or sprinkles, offering a perfect balance of rich cocoa, tangy cream cheese, and sweet coating. Ideal for celebrations or a decadent treat, these easy-to-make sweets chill to a firm, creamy texture before serving.
Last Christmas, my kitchen looked like a red velvet crime scene. There was flour on my sweater, chocolate smeared across the counter, and I could not stop laughing at how something so elegant comes from such messy work. My sister walked in, took one look at the disaster, and asked if we were even making food or just creating modern art. Those truffles disappeared in twenty minutes at the party, and nobody cared about the state of my countertops.
I first attempted these for a Valentine Day dessert table, thinking they would be impressive but time consuming. By my third batch, I had the process down to a relaxing Sunday ritual, completely transforming how I viewed homemade candies. Now whenever I need a gift that feels special but does not require professional pastry skills, these truffles are my go to solution.
Ingredients
- All purpose flour: The structural backbone of your cake base, providing just enough protein to hold everything together without becoming tough
- Unsweetened cocoa powder: Essential for that classic red velvet depth, keeping the chocolate present but never overpowering
- Buttermilk: The secret tenderizer that reacts with baking soda for extra lift and adds a subtle tang that cuts through the sweetness
- Red gel food coloring: Gel delivers that iconic vibrant red without adding excess liquid that food coloring drops would introduce
- Cream cheese: Use this at room temperature to avoid lumps, creating that signature smooth, tangy filling that balances the sweet cake
- White chocolate: High quality white chocolate makes or breaks this coating, so choose one with real cocoa butter for the best melting behavior
Instructions
- Bake your foundation:
- Preheat that oven to 350°F and prep your 8x8 inch pan with parchment paper. Whisk together your dry ingredients in one bowl, then combine buttermilk, food coloring, and vanilla in another. Cream your butter and sugar until fluffy, beat in the egg, then alternate adding dry and wet ingredients starting and ending with dry. Bake for 25 to 30 minutes until a toothpick comes out clean, then cool completely.
- Create the dough:
- Crumble your cooled cake into fine crumbs in a large bowl. In a separate bowl, beat cream cheese, powdered sugar, and vanilla until completely smooth. Fold the cream cheese mixture into your cake crumbs, mixing until a soft, moldable dough forms that holds together when pressed.
- Shape and chill:
- Scoop portions and roll them into 1 inch balls between your palms, placing each one on a parchment lined tray. Freeze these for 20 to 30 minutes until firm, which prevents them from falling apart during the dipping process.
- Coat and finish:
- Melt your white chocolate until smooth using a microwave or double boiler. Dip each chilled truffle into the chocolate, ensuring even coverage, then return to the tray. Sprinkle with cake crumbs or red sprinkles while the chocolate is still wet, then refrigerate for 20 minutes until completely set.
 Pin It
 These became my signature contribution to family gatherings after my niece declared them better than anything from a fancy bakery. Now she requests them for every birthday and holiday, and I never say no because seeing someone genuinely excited about something I made never gets old.
Making Ahead Like A Pro
The dough balls freeze beautifully for up to a month, so I often double the recipe and stash half for later. When I am ready to finish them, I let the frozen balls thaw slightly in the fridge for about fifteen minutes before dipping. This means fresh, impressive truffles can be ready in under an hour whenever unexpected company shows up.
Chocolate Coating Secrets
I have learned that adding a teaspoon of coconut oil to my white chocolate while melting creates a smoother, more workable coating that sets with a gorgeous shine. If your chocolate feels too thick for dipping, this trick saves the day without affecting the flavor. Work quickly once you start dipping, as the cold truffles will cause the chocolate to thicken faster than you expect.
Flavor Variations Worth Trying
Sometimes I swap the white chocolate coating for dark chocolate when I want something less sweet, and the contrast against the red velvet is stunning. A pinch of sea salt on top while the chocolate is wet creates that salted chocolate effect everyone loves.
- Try adding 1/2 teaspoon of espresso powder to the cake crumbs for a mocha undertone
- Roll some truffles in crushed graham crackers instead of sprinkles for a cheesecake vibe
- Stud the tops with mini chocolate chips before the chocolate sets for extra texture
 Pin It
 There is something deeply satisfying about turning cake into something entirely new and decadent. These truffles have become my answer to almost any celebration, because who can say no to bite sized happiness?
Recipe Q&A
- → Can I use store-bought cake for these truffles?
-
Yes, using pre-made red velvet cake can save time and still yield delicious results when combined with the cream cheese filling.
- → What chocolate works best for coating?
-
White chocolate is traditional for the smooth coating, but dark chocolate can be used as an alternative for a richer taste.
- → How do I prevent the coating from cracking?
-
Ensure the truffles are well chilled before dipping, and allow the chocolate to set at a cool room temperature or in the fridge.
- → Can these truffles be stored long-term?
-
Store truffles in an airtight container in the refrigerator for up to five days to maintain freshness and texture.
- → What texture should the truffle mixture have before shaping?
-
The mixture should be soft and moldable, combining smooth cream cheese and finely crumbled cake for easy rolling.