 Pin It
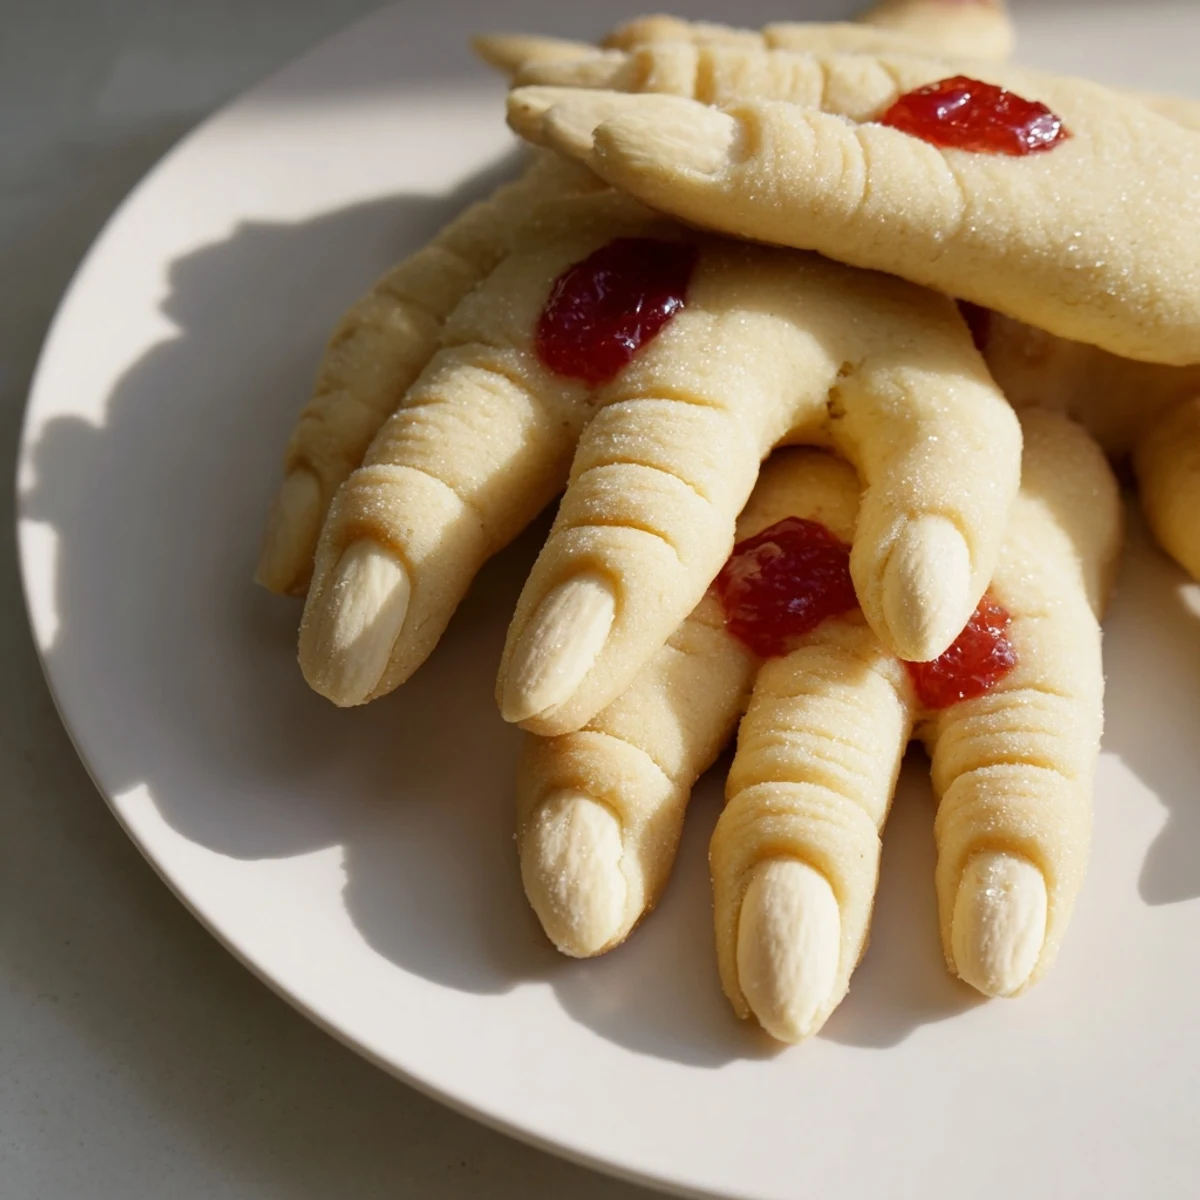
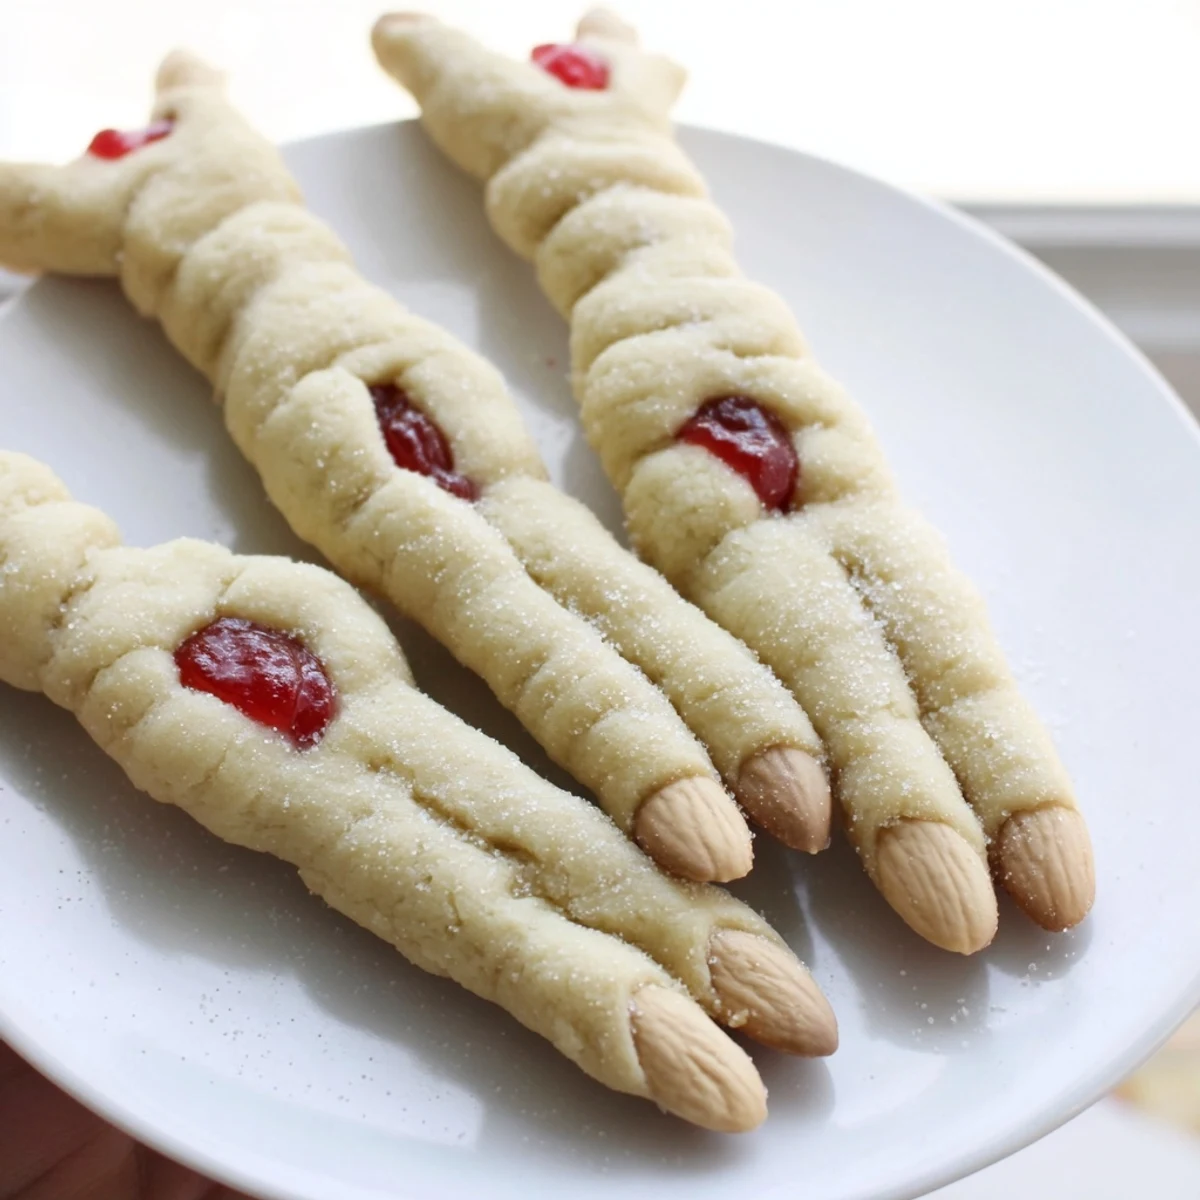
 These spooky Halloween treats feature buttery almond-flavored dough shaped into realistic witch fingers. Each finger gets detailed with knife-cut knuckles and a blanched almond fingernail, completed with a bloody effect using red gel or strawberry jam. The 45-minute process yields 24 creepy cookies that are frightfully fun to serve at parties.
My daughter came home from school last year absolutely determined to win the classroom Halloween bake-off. She pulled out my phone at dinner and started scrolling through increasingly grotesque cookie designs until she stopped at these witch fingers and whispered that's the one. We spent three hours covered in flour, laughing until our sides hurt as we tried to make knuckles look realistic and debated whether the jam should be bright red or dark dried blood color.
The first batch we made had fingernails that kept falling off during baking, leaving these disturbing nail-less fingers that looked even creepier than intended. My neighbor actually refused to touch the plate until I explained what happened. Now I know to press the almonds in gently but firmly, and the jam trick at the end makes everything stay put while adding that perfect gruesome touch.
Ingredients
- Unsalted butter: Softened properly makes all the difference in getting that smooth creamy texture that holds the finger shape
- Granulated sugar: Cream this thoroughly with the butter or your fingers will spread into blobs during baking
- Almond extract: This is what makes them taste like real cookies instead of just shaped playdough
- Blanched almonds: Look for the smoothest ones you can find, they look much more like fingernails
- Red gel or strawberry jam: The gel stays put better but jam gives that authentic coagulated look
Instructions
- Preheat and prepare:
- Get your oven to 325°F and line those baking sheets now, because once you start shaping fingers you will not want to stop.
- Cream the butter and sugar:
- Beat this mixture until it is pale and fluffy, which takes longer than you might think but is essential for cookies that hold their shape.
- Add the egg and extracts:
- The almond extract here is the flavor star, so do not be shy with it, and mix until everything is completely incorporated.
- Combine the dry ingredients:
- Whisk your flour, baking powder, and salt together in a separate bowl to ensure even distribution.
- Mix the dough:
- Add the dry ingredients gradually and stop as soon as the dough comes together, because overmixing makes tough cookies.
- Shape the fingers:
- Roll tablespoon portions into 3 to 4 inch ropes, making them slightly thicker at one end for that realistic finger shape.
- Add the details:
- Use a knife to make knuckle creases and press an almond firmly into the thicker end, wiggling it slightly to secure.
- Bake until golden:
- These need 18 to 20 minutes in the oven, until they are just barely starting to turn golden around the edges.
- Add the bloody effect:
- Carefully remove each almond, dab a little red gel or jam into the cavity, and press the almond back in place.
- Let them cool:
- These need to cool completely on a wire rack or the jam will be too runny and the almonds might slide off.
 Pin It
 Last Halloween my sister brought her new boyfriend to our party and I watched him hesitate when I offered the plate of cookies. He took one bite, looked horrified for about three seconds, then ate three more while admitting they were the best cookies he had ever had. They are now his requested treat for every family gathering.
Getting The Creepiest Shape
I have learned that slightly irregular fingers look way more realistic than perfectly uniform ones. Make some crooked, some longer, some with more prominent knuckles. The variation makes people pause and look twice, which is exactly the reaction you want.
Making Ahead And Storage
You can shape all the fingers and freeze them raw on a baking sheet, then transfer to a bag and bake straight from frozen when needed. Just add a couple of minutes to the baking time. The finished cookies keep for a week in an airtight container, though they never last that long at my house.
Serving Ideas For Maximum Impact
Arrange these on a platter with some broken cookie pieces scattered around like they have been violently torn apart. I once served them in a shallow wooden bowl lined with fake cobwebs and watched adults approach them with genuine trepidation before reaching in.
- Place a small bowl of extra red jam beside the plate for dipping
- Stick some fingers upright into a cup of dirt crumbled chocolate cake
- Use different colored jams for variety and let guests choose their preferred gore level
 Pin It
 These cookies have become such a Halloween tradition that my kids start asking about them in September. There is something deeply satisfying about food that makes people both laugh and recoil before reaching for seconds.
Recipe Q&A
- → How do I make the cookies look like witch fingers?
-
Roll tablespoon portions of dough into 3-4 inch logs, use a knife to create knuckle lines, and press a blanched almond into one end for the fingernail. Add red coloring or jam underneath the almond for a creepy bloody effect.
- → Can I make the dough ahead of time?
-
Yes, you can refrigerate the dough for up to 2 days before baking. Let it soften slightly at room temperature for easier shaping, as cold dough can crack when rolling into fingers.
- → What can I use instead of almonds for the fingernails?
-
You can use sliced almonds, cashew halves, pecan pieces, or even candy eyes pressed into the dough. For nut-free versions, try using small pieces of white chocolate or shape the dough to create pointed nails.
- → How should I store these cookies?
-
Store in an airtight container at room temperature for up to 5 days. Layer between parchment paper to prevent sticking. The bloody jam effect may soften slightly over time but remains visually effective.
- → Can I freeze witch finger cookies?
-
Yes, freeze baked cookies for up to 3 months in freezer-safe containers. Thaw at room temperature before serving. You can also freeze unbaked shaped fingers on a baking sheet, then transfer to bags and bake from frozen, adding 2-3 minutes to baking time.